You can have an unlimited number of ‘floors' to manage your restaurant. Each floor has its own tab on the floor plan.
In the example below, the restaurant has 4 distinct floors: Restaurant, Mezzanine, Private Room & Terrace.
From the main menu, click on Floor Setup and then on Floor

Click on the + Add Floor button.

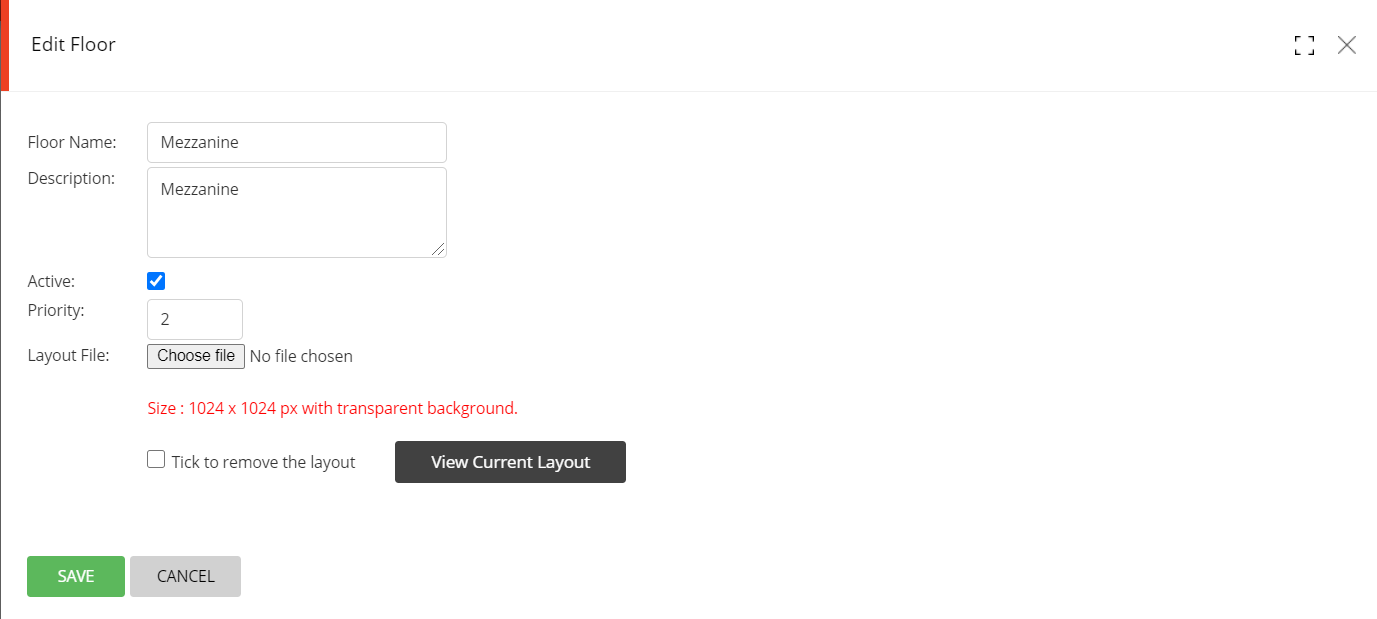
Enter the name for that floor in Floor Name: and a narrative in Description:
The Active: check box should be selected if you want the floor to be displayed on the Floor Plan screen. Sometimes, you may not want to display a floor i.e. a private dining room or a terrace during winter months, in which case you can unselect the Active: box.
Priority: will determine the order that the floors are displayed on the floor plan
In the example below, my floor called ‘Mezzanine’ is displayed in second position, with a setting of Priority: = 2

You can add a background that shows items like walls, windows, waiter stations, kitchen pass, etc by clicking on Choose file and selecting an image from your computer. Please note that it needs a transparent background.
To remove a picture background, select the Tick to remove the layout box.

When all information has been entered, click on SAVE.
The new floor is displayed on the Floor Management summary page.

To edit a floor, click on the Edit icon
To delete a floor, click on the Delete icon
Note: If you try to delete a Floor that contains one or more active areas, the system will notify you: This Floor is configured for one or more Areas