The purpose of Table Groups
Table Groups is used to accommodate larger parties by grouping tables together. You can have an infinite number of Table Groups, based on the table configuration in your restaurant.
There are 3 different ways to accommodate larger parties:
From the main menu, click on Floor Setup and select Table Groups


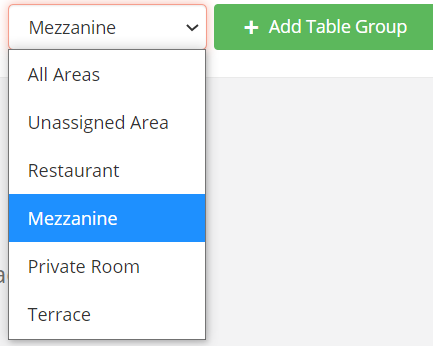
Select the area in which the Table Group will be located and click on + Add Table Group button

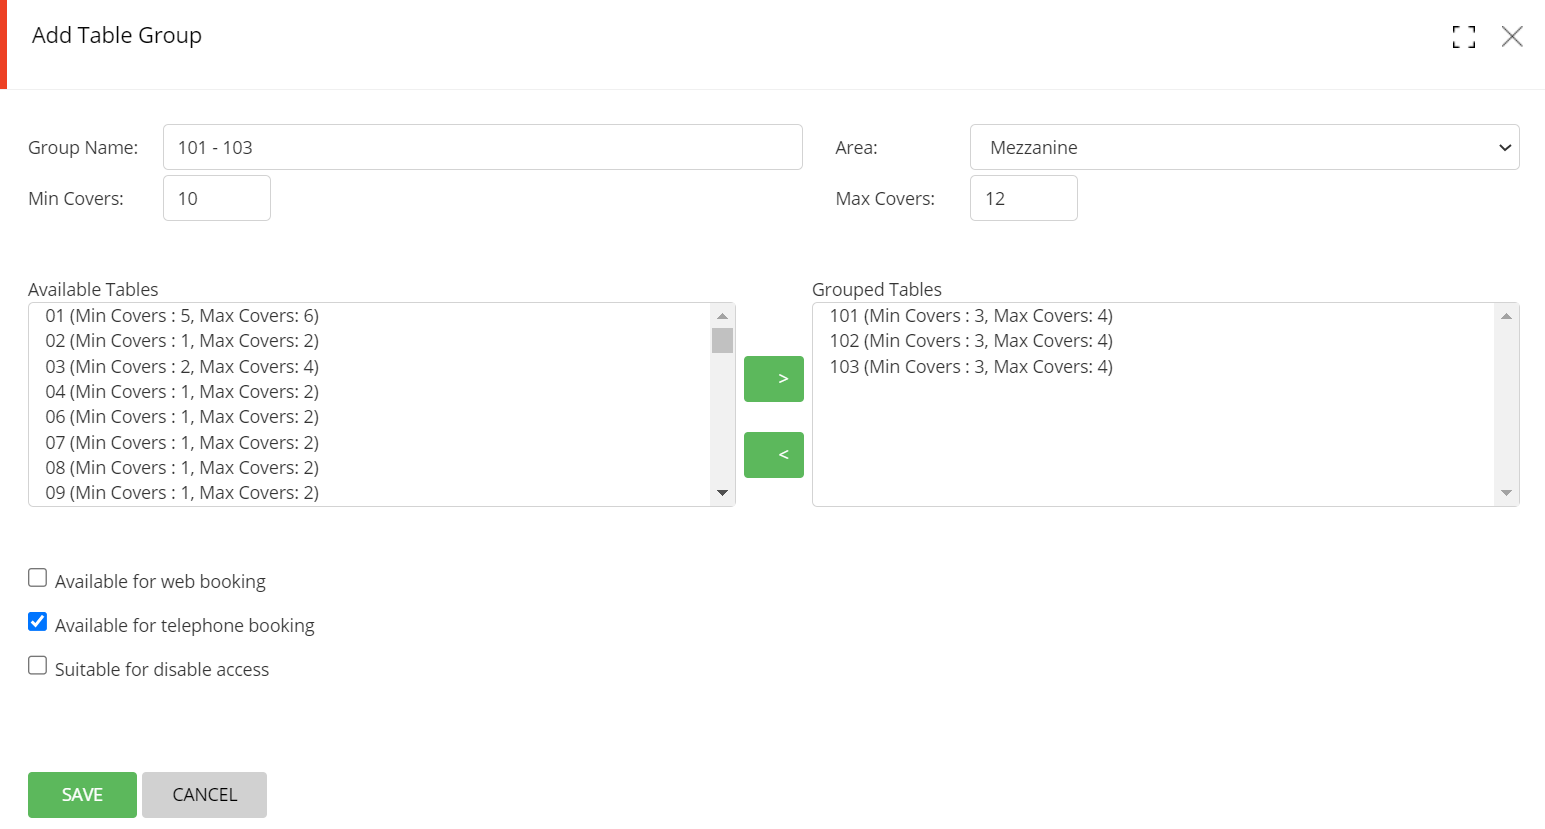
The following information needs to be entered:
Example: In the example below, we are grouping tables to make a Table Group using table 101 + 102 + 103 that can accommodate a minimum of 10 guests and a maximum of 12 guests. This table Group is available only for Telephone bookings, but not available for Web bookings or Disable Access.

The new Table Group will then be displayed in the Table Groups screen and show all the attributes allocated to that Table Group:

To edit an existing Table Group, click on the Edit icon. If you change the MIN Guest or MAX Guest number, the system will check for existing future bookings that are already allocated to that Table Group, the system will display the booking reference numbers and will not allow for the Table Group to be edited, until you have re-allocated those bookings to other tables.
To delete a Table Group, click on the Delete icon. If existing future bookings are already allocated to that Table Group, the system will display the booking reference numbers and will not allow for the Table Group to be deleted, until you have re-allocated those bookings to other tables.
NOTE: If you have created any table blocks, then by default, a Table Group that includes one or more blocked tables will not be available to accommodate a booking.
VERY IMPORTANT: If your Table Group has not been allocated an Area (it will show as ‘Unassigned Area’, then that Table Group will be deemed as ‘inactive’ and will not be accepted to accommodate bookings.
You can either select an existing Table Group, or you can allocate multiple tables during the booking process. Simply tick the Show all tables option.

Then select the tables that you require:

The system will alert you if the table selection is UNDERBOOKED or OVERBOOKED (as a guidance only).


You can then add or remove tables from your current selection.
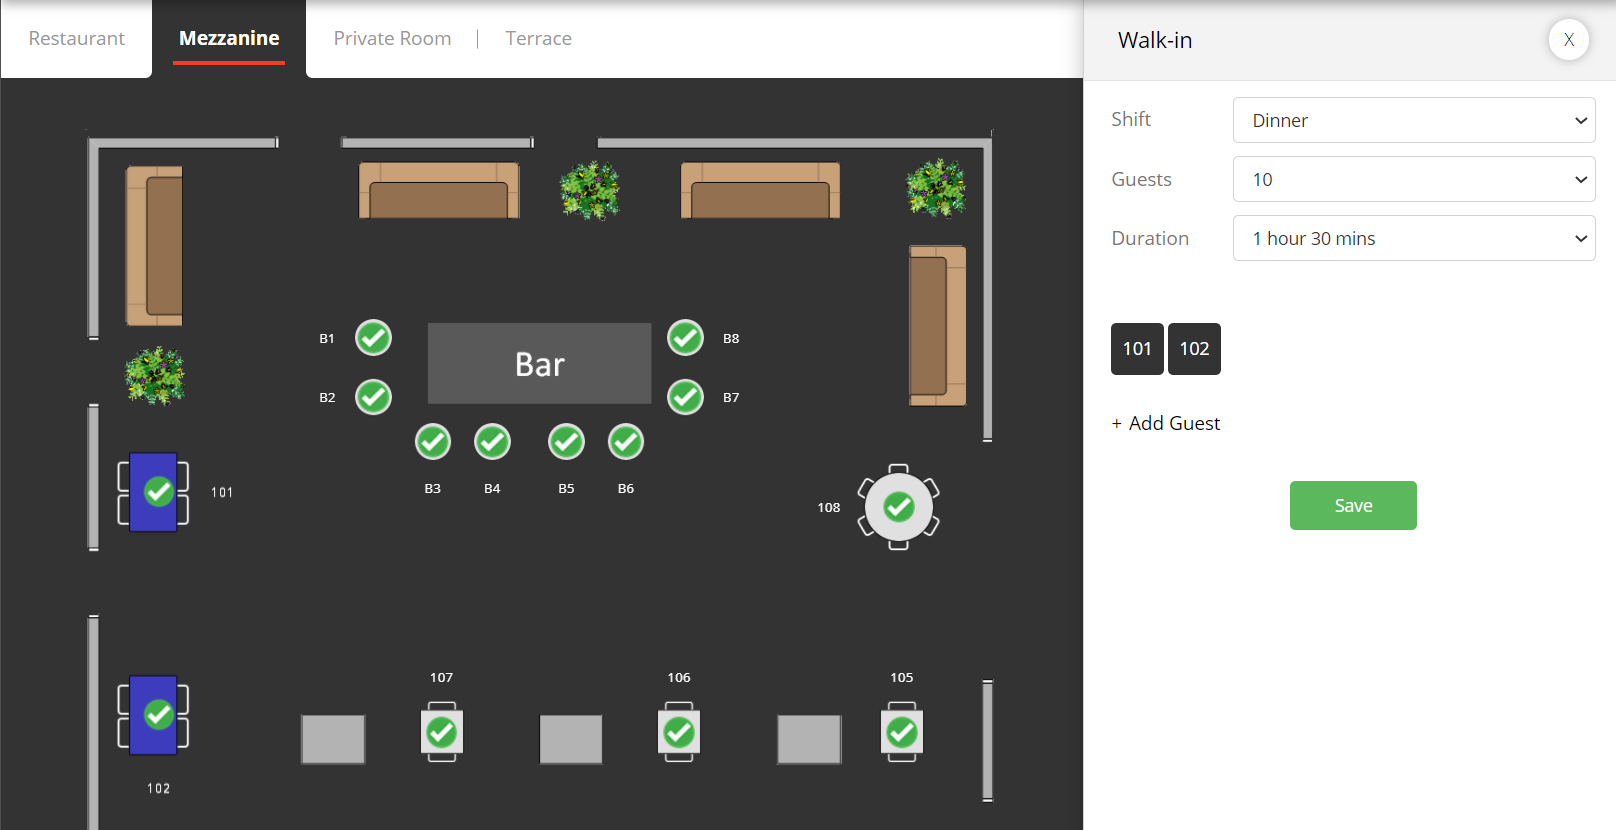
In Floor Plan Mode, simply select the tables that you want to allocate to that walk-in and click on SAVE. The selected tables will appear in the Walk-in pane. To remove a table, simply click on that table again.

Once you mark the booking as COMPLETE, all the tables in that grouping will automatically be shown as free and available.